How to Reset a Poshmark Listing's Just-In Date
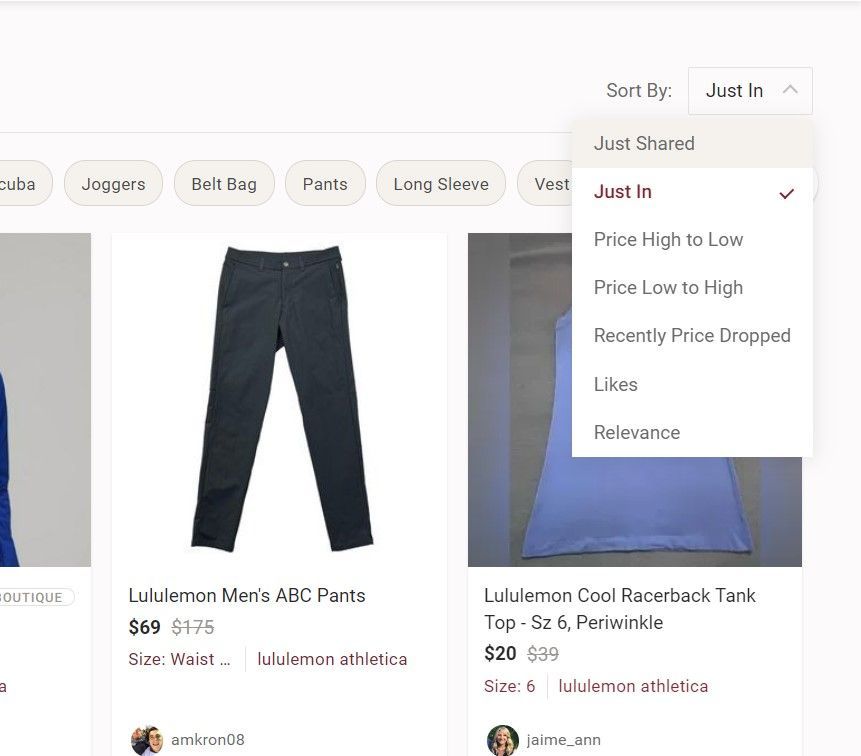
One of the most common search sorting options used by buyers on Poshmark is to sort search results by "Just In". Many buyers use this to identify fresh listings and snap up recently stocked, in-demand items. By resetting the "Just In" date of old inventory, you're putting them in front of a lot more potential buyers and increasing the likelihood of making a sale--especially with some of your most motivated buyers.
What "Just In" on Poshmark?
The first time a listing is assigned a "Just In" date is when it's published for the first time. While this date is not visible to buyers or sellers on the platform, we've learned while working with Poshmark's API that the company assigns "Just In" timestamps such as 2022-04-12T11:11:35-07:00 to every published listing that reflects the date and time in which a draft is published.
In order to change this date after the initial publish, you only have two options as a seller: either use Poshmark's "copy listing" feature, or manually create a brand new listing. We'll go over both of these approaches in detail in this post.
Option 1: Use the Copy Listing Feature on Items That Have Been Listed For at Least 60 Days
Poshmark's Copy Listing button works by creating a new duplicate draft of the original listing, publishing the draft, and then removing the old listing. This technique only works for items at least 60 days, in terms of resetting an item's Just In" date. We've tested this repeatedly and confirmed that if you copy a listing under 60 days old, the new duplicate listing will have the same old just-in date and therefore your listing will not appear to be fresh to buyers.
How to Reset an Item's Just In Date Using the Copy Listing Feature
Step 1: Go to an existing listing that's at least 60 days old and click "Edit Listing"

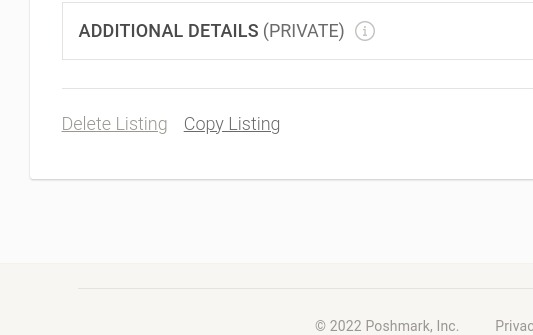
Step 2: Scroll to the bottom of your listing and click "Copy Listing"
This creates a new draft containing all the details from the original listing.
Step 3: Update the title and publish the listing
The newly copied draft will have a title prefixed with "COPY -". Make sure you remove this from the draft title. Once the title is updated, double check the draft and hit "update" it if it all looks good.
Step 4 (Final Step): Delete the old listing
You should delete the old listing as soon as possible, so as not to have duplicate listings in your closet. Beyond looking messy, this also puts you at risk of selling the same item twice, and having to cancel a sale (a bit Posh no-no). But first, make sure that the new listing is in fact in your closet.
Once you've confirmed that the new listing is there, go through steps 1 and 2 again for the original listing, but instead of copying it, click "Delete Listing" to remove it from your closet.
But what if you want to refresh a listing that's less than 60 days old? 60 days is a long time to wait! This is possible, but it's labor intensive.
Option 2: Manually Create a Brand New Listing
To avoid the 60 day limit, your only other option is to create a brand new listing and manually copy over the information from your original listing. This is very labor intensive because it requires you to copy over every detail - title, description, images, etc - but it is guaranteed to reset the just-in date of your item regardless of its listing age.
How to Reset an Item's Just In Date by Manually Creating a Brand New Listing
Step 1: Click "Sell On Poshmark" to create a brand new listing
Step 2: Open the listing you want to copy and click "Edit Listing"
Step 3: Copy each image from the listing
Do this by clicking on each image and then right clicking the image so you can save it. We recommend doing this in reverse order (last image first) so that you can re-upload the images later in the correct order.
Step 4: Upload images to new listing and copy over original listing details
Start with the images - upload each one to the proper position. Then start copying all the other fields over, starting with the title. This takes a while at first but you'll get faster with practice.
Is there anything else I can do to reset Just In dates?
At ClosetWitch, we offer an automation tool for doing a hard reset of just-in dates that manually creates a brand new listing and copies over the information of the old listing just as a human would. We can even help you identify your oldest or least-liked listings with flexible filters so that you can start selling items that have sat around the longest, or were listed while they were out of season.
Need to edit the price too? Increase or decrease prices in batches, or by hand. Our users often sell items immediately at higher prices than they'd originally been listed at. That's the power of resetting Just In dates.
Want to try it free? Install the free Chrome extension and upgrade to ProLite. Most users sell a few relisted items immediately on their first batch of relistings. We allow up to 30 relists per hour, so you can relist most medium size closets within a few days.
Questions, comments, feedback? Drop us a line at [email protected].
-Alan @ ClosetWitch
Read More: